Wednesday 22 January 2014

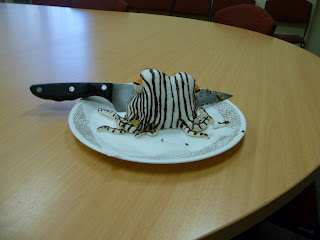
Blue-Ringed Octopus

Rating: Easy (but a bit fiddly)
Time: About 2-3 hours for the decorating
Richness: About1 treadmill (unless you consume lots of the mmf).


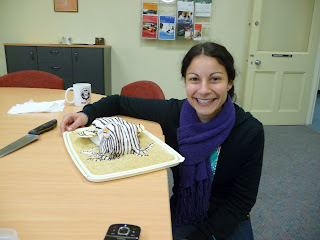
So this was another one for Sarah, this time for the hand-in of  her Thesis.
I based it on the striped pj squid I made for her last year (well, year before. I've been a bit late posting this one).

Anyway, you need:
1 basic chocolate cake (or any cake of your choice really) baked in a loaf tin
a suitable cake board and sharp knife
Marzipan
1 quantity of white/cream coloured marshmallow fondant (mmf)
cocoa powder
food colouring
tumeric powder (to act as a lovely yellow colouring)
A clean/new fine(ish) paintbrush
dessicated coconut


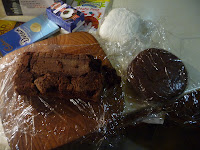
Some basic ingredients, which when shaped start already looking remarkably like a squid/cuttlefish/octopus.
Perhaps I should just call this a standard cephalopod base? ;)
I did have a picture (well, several) from the depths of the internet, to try to make sure I had the shape of the body right.

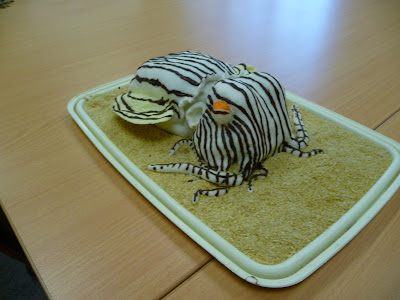
Anyway, then I put it on the board, and covered with marzipan and fondant. Used several long rolled out pieces of fondant for tentacles, stuck on some discs as eyes, made the siphons etc (see the other cuttlefish cake for more details) and it turned out thus:


From this point in time, the fiddly bits begin. I used a combination of cocoa powder and tumeric to colour the body a little, as most blue-rings have a yellow-brownish body with blue rings.
Once the cocoa was on, I started painting on the spots using a clean paintbrush.
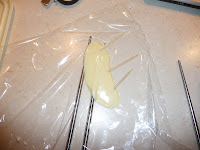
I did a basic blue ring (see below, left), let it dry, then painted over the outside again with a mixture of blue food colouring, cocoa (to make it darker) and water (below, right).


 To finish it off, I shook some dessicated coconut in a plastic bag with some tumeric and cocoa powder. From now on, I shall call it a 'standard base filler' I think :)

The final product?


Sarah again seemed pleased ;)


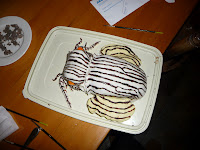
(just for giggles you may notice the similarities between these pics and the cuttlefish ;)  )

In a word?: Satisfying

Saturday 27 July 2013

Flourless chocolate zebra cake

Rating: Easy
Time: About 1 hour, including decorating
Richness: About 3 treadmills.

 So I decided to put a richness rating, indicating how decadent it actually is or how guilty you should feel eating it ;) As this one was made to take to netball, I figure we all deserve to replace the calories we used on court!

*Edit: Turns out this is amazing when made with Hazlenut meal instead of Almond,  and even more amazing than that if you substitute about 2/3 of the coffee with Frangelico (or something similarly alcoholic and hazlenutty)*


Ingredients
Cake
- 1 espresso shot, or 1 teaspoon of instant coffee dissolved in about 50mL of boiling water
- 200g Butter (I used salt-reduced, but not unsalted)
- 220g of dark chocolate (or a whole block close to that weight - I used the 'original' cadbury old gold, as I like that % cocoa, but if you want it darker use a higher % cocoa).
- 250g Almond meal
- 125g Caster sugar
- 4 Eggs, separated
- 25g Cocoa powder

Topping
- 150 grams Dark Chocolate
- 200mL Cream
- 50g White Chocolate

Preheat your oven to 180 degrees (celcius) and grease a 24cm spring-form tin.

Cut up your butter into pieces, break up the chocolate and place both into a saucepan over medium heat to melt it all together (stir to combine). Once it's all melted, stir in the cocoa powder and coffee. Set aside to cool slightly while you do the rest.

Beat eggwhites to soft-peak, and set aside.

In an electric mixer, combine egg yolks and sugar and beat until thick. Add in the almond meal and beat in the chocolate mix until well combined. At this point mine was very thick and sticky, almost stretchy in appearance.

Take a spoon or two of your egg-whites, and mix into the chocolate batter. Then fold in the remaining egg-whites. Not worrying too much about losing air and just mixing in the first spoonful or two helps thin out the mixture, and makes it easier to fold in the rest. Overall I find my batter is better if I do it this way, but it's up to you :)

Pour mixture into prepared tin, and bake for around 30-40 minutes (mine took closer to 30mins, but it'll depend on your oven). Let it cool in the tin, then you're ready to decorate!

To decorate, take the remaining dark chocolate and melt in either a double boiler or in the microwave. Mix in the cream, it should go thick and glossy. This is a basic chocolate ganache :)
Spread this over the cake, and leave it until set. The more cream you put in, the softer it will set, so adjust to your taste (I actually never measure it, so these quantities may be approximate :P).
Once ganache is set, melt the white chocolate and spread over the cake in stripes.
And you're done! Eat and enjoy :)

You could also substitute hazlenut meal for the almond, I might give that a go next time. I might also make the white chocolate into a ganache as well, so it doesn't end up with soft-ish ganache with hard-set stripes over the top.
But overall? Rich but light, dead easy to make and highly successful!

In a word? Delicious!

Monday 3 June 2013

From the ashes of a delicious fruit cheesecake, grew a decadent chocolate recipe...

Rating: Easy
Time: About 1.5 hours

So from the previous recipe, I invented a bit. Worked out well enough to get written up here, so win win for everyone I think ;) Still using the 50/50 full fat/reduced fat ingredients, but it is full of chocolate so will have a slightly higer calorie count than the previous recipe. But if you're eating chocolate cheesecake, why are you counting calories in the first place??? It is a bit rich though, so small slices only ;)


Ingredients
Base
100g Unsalted butter
50g Hazelnut meal
100g Plain flour
50g Caster sugar
25g Cocoa powder (if desired - I only thought to put this in after I'd made mine, so haven't tried it. If you use this you may need to up the sugar a little, and possibly the butter by about 10-20 grams too)
A little egg white for sealing base when baking (can use some of the egg white you get from separating eggs for the filling)

Note: if you want the base to go up the sides of the tin, you'll need to double the quantities here.

Filling
250g Sour cream (low fat, room temperature)
250g Cream cheese (full fat, room temperature)
100g Caster sugar (or to taste, depending on what chocolate you use and how sweet you like things)
200g block dark chocolate (% cocoa fat is up to you, I used half 45% (which is the standard dark I can get here) and half 70% cocoa and it turned out a little rich. Next time I'd use all standard, and I'm someone who loves really dark chocolate!)
3 eggs, separated
A splash of either a chocolate liquor, or something nutty like Frangelico if desired

Topping
150g dark chocolate
50-100mL cream

Method
So basically follow the method of the previous recipe. For those who didn't read that one, or who can't be bothered flicking back one, here it is anyway:
To make the base, combine all base ingredients in a bowl (except the egg white) and rub in the butter until your mixture resembles coarse breadcrumbs and you can't really see huge lumps of butter left (one day I'll take step-by-step photos and edit them into this post). Take a 23cm springform tin, give it a light spray with cooking oil and line it with baking paper. I like to cut out a base the same size as the tin, then with the tin opened line the paper around the sides. Then I close the tin, pinching the paper between the sides of the tin and the base. It might make it a little wrinkly, but is much easier to handle later. I also trim any excess to just above the level of the tin to make it easier to work with.
When you've lined your tin, press the base mixture into it. Again if you want it to go up the sides, you'll need to double the quantity.
Bake in a 150 degree oven (celcius) for 15 minutes, or until golden. Then remove from oven and brush with a little egg white to help seal it, and bake for another 5 minutes or so. Take out of oven to cool while you prepare the filling.

To make the filling combine cream cheese and sugar in the bowl of an electric mixer and beat until as smooth as possible. Then scrape down the sides of the bowl and add in a spoon or two of sour cream, and beat again until smooth. Keep doing that until all the sour cream is in, and the mixture is silky smooth - this way tends to result in fewer lumps than what happens if you add it all together at once. Add in the egg yolks one at a time, beating well between each addition. If you're using any liquor, it's best to add it at this point, while the mixer is still running and to ensure it's combined well so it doesn't make the chocolate go awful when it's added.
Beat the egg whites to stiff peak in a different bowl and set aside.
Melt the chocolate either carefully in a heat-proof bowl in a microwave (just make sure it doesn't burn) or over a double-boiler (I'm lazy so use the microwave) and while the mixer is running at moderate speed, beat the melted chocolate into the cream cheese mixture. It may go quite thick, but that's ok. It'll be thinner if you use liquor too though.
Stop the mixer when it's all combined and smooth, and mix in about half of the beaten eggwhites with a wooden spoon or plastic spatula. You don't need to be too finicky about folding them in, if they flatten a bit that's ok. Once they're well combined, gently fold in the remaining egg whites. Doing them in 2 lots means you do lose some air from the first half, but they combine better and it makes it much easier to fold in the other half carefully. So overall I find you tend to lose less air than if you folded them all in carefully at once. Pour this mixture into the tin with the base in it, and bake in a 150 degree oven for about 45-50 minutes, or until the top is set and feels a little springy to the touch (it might wobble a bit in the middle but will firm on standing).

Once the cheesecake is cool, make the topping by melting the chocolate (again, I use the microwave) and adding the cream. Stir until well combined and glossy, and spread over the top of the cake. You could take the cheesecake out the tin and spread the topping over the top and down the sides if you didn't put the base up the sides of the tin, up to you. I just put it on the top.
The more cream you add to the topping, the softer it will set. It will get to a point where it doesn't set at all. I like it soft, as it's easier to cut, but it's up to you.
And that's it! Enjoy!

In a word? Rich

Saturday 1 June 2013

Lucious Low(ish) fat baked Lemon Cheesecake

Rating: Really easy
Time: About 1.5 hours to bake (including the base and the filling), about 20 minutes prep

So today was a reminder that even the most simple cakes can be heavenly.
Below is the recipe for a lower fat lemon cheesecake that is baked, but almost has the texture of a no-bake one. (sorry about the terrible picture, I only remembered to take one once it had already been massacred!). I say lower fat, as 50% of the filling is low-fat, 50% full fat. I find this tends to give the depth of flavour that full fat has, while still reducing the fat content by about half.
I also don't really like biscuit based cheesecake, so made a shortcrust/shortbread-like base for this one. It worked out brilliantly! Yay! Light and crispy and not too heavy and fatty. I also only made enough to cover the base, not go up the sides of the tin. If you want the base to go up the sides, just double the quantity.

Ok, now for the recipe...


Ingredients
Base:
- 50g Almond meal
- 100g plain flour
- 50g caster sugar
- 100g unsalted butter, softened and chopped into small cubes

Filling:
- 5 medium lemons (you need ~ 1/3 cup of juice, and the zest of 1)
- about 150g or 1/2 cup of caster sugar (or to taste - 1/2 cup tends to make this a little tart, which is how I like lemon things to be, but for those who prefer sweeter things, just add a bit more)
- 3 eggs
- 250g of low-fat sour cream*
- 250g of full fat cream cheese*

*make sure these are at room temperature. It will make it much easier to beat them until smooth. If you use them straight from the fridge you'll have lumps that will never go away

Methods
To make the base, combine butter, flour, almond meal and caster sugar in a small bowl (remember, if you want it to go up the sides then double the quantity of all ingredients here). Rub in the butter until the mixture resembles fine breadcrumbs, then tip into a well greased, paper-lined 23cm springform tin (make sure the paper lining it goes all the way up the sides, as you'll want that there to stop the filling sticking to the sides of the tin later - if you don't do this it can give a weird metal taste to the filling). Press mixture into pan evenly over the base, and bake in a 150 degree (celcius) oven for about 10-15 minutes, or until it is golden brown .
Take out the oven and cool while you make the filling (it should be room temperature to cold before you put the filling in, no hotter or you'll start to melt the cheese and cook the eggs when the mixture hits the base).
As an aside, this is basically a hybrid short-crust pastry and shortbread biscuit recipe, so the more you work it  the firmer it will be. I wanted a light, crispy-crumbly base that was only just firm enough to hold together, so worked the mix only to fine breadcrumb texture. If you want it firmer, work it more (but not too much as you'd not want a really tough base, surely?!)

To make the filling combine sugar and cream cheese and beat with an electric mixer until the mixture is smooth. Then scrape down the sides of the bowl and add a spoonful of sourcream and beat until smooth. Keep scraping down the sides of the bowl and adding spoons of sour cream and beating smooth until all the sour cream is in. This is the best way I've found to get a nice smooth batter. If you add it all in together at the beginning you tend to end up with little lumps that are almost impossible to get rid of. I'd also suggest starting slow then speeding the mixer up as it starts to get smoother, otherwise it'll slop everywhere. Once the mixture is nice and smooth, add the lemon zest and the eggs 1 at a time, beating well in between adding each egg. At this point it should go quite liquid. While beating, add lemon juice and continue to beat for about a minute, until the mixture is smooth and the chances of it curdling are past :)

*NOTE: Having made this one multiple times now, I've found that separating the eggs and only beating in the yolks works well. I then beat the whites to stiff-peak, and fold them into the mixture (half at a time, folding them in after the lemon juice has been added) to make it even lighter and more mousse like. It works really well - I'd recommend doing that every time from now on!!!*

Pour mixture onto base, and bake in a 150 degree (celcius) oven for about 50 minutes, or until just set in the middle (it should be a little springy to the touch, but might look a little wobbly in the middle. This is ok, it should firm up on standing).
Turn the oven off, leave the door open and allow the cake to cool. In theory this should stop it cracking, but I was impatient and just took it out the oven so mine cracked hugely. Having said that, even when I've tried doing this to stop the cracking, it's still always cracked for me. Any ideas as to how to stop that happening?!

Once the cheesecake is cooled, you can either serve it dusted with icing sugar, or make a tangy lemon jelly to go over the top. Beware if your cake has cracked, the jelly will sink into the cake and form a layer near the bottom (mine did this). This does work well, but I think for simplicity sake I'll just dust with icing sugar next time. If you put jelly on the top, make sure you don't remove the paper yet!!! otherwise it'll leak ;)

To make the jelly, I added a few spoons of caster sugar to a heat-proof measuring jug, and dissolved that sugar in boiling water. Next I added some limoncello and lemon juice (to taste), and a little more warm water. I then dissolved a few teaspoons of gelatin into the liquid (there should be directions on the gelatine packet indicating how many teaspoons of gelatine you'll need to set a particular volume of liquid) and allowed it to cool. When it cooled to about room temperature, I poured it over the top of the cheesecake and stuck it in the fridge until it was set. You could use a sweeter packet dessert jelly for this, and of course the more jelly you have, the thicker the layer will be ;)

This was a delicious cake, silky smooth and light. The base stayed crisp, the jelly was tart and the filling had almost a moussey texture. I've made it a few times now, it's really easy to make and is sure to be a hit with everyone.

In a word? Easy!

Thursday 20 December 2012

My attempt at an engagement cake :)

Rating: Easy
Time: nearly 2 hrs to cook the mudcake, about an hour tops to decorate.

Finally a pretty cake that I did myself! This one was to celebrate my (and my partner's!) engagement as well as my birthday.


You will need:
- a chocolate cake of your choice (I used a rich mudcake) baked in a round tin
- Roll-out fondant / Marshmallow fondant (your choice - usually I'd use mmf as it tastes better, in this case I had no time so used packet roll-out stuff)
- Marzipan
- 3mm ribbon - I picked up a 6m roll for 99 cents, otherwise get about 2-3 meters depending on the circumference of your cake. (you can also get a couple of colours if you'd like - I match the ribbon to the flowers which is why it's pink for this cake. I don't like pink much, but they were the roses we had out at the time)
- new (or sterilized in boiling water) dress-making pins (I used a new box of 60mm pins, without pin-heads, unless you want to get pearlescent ones to look like it has pearls attached, otherwise plastic pin-heads look really tacky)
- Fresh flowers and leaves from the garden :)
- A piping bag with shell and normal nozzles (I only had a shell nozzle, which  is why the lettering looks crappy on the top - it'd have been better with plain piping, but I ran out of time to fix it)

To start off, I baked a round rich chocolate mudcake the night before I needed it and wrapped it in clingwrap and kept it in the fridge.
Come the morning, I leveled it out (cut off the top), and flipped it upside-down to have a nice flat top. I then plugged up any gaps with marzipan, and covered it (as much as possible before I ran out) with the remaining marzipan. If you're going to be doing this a few days before eating it, sealing it up properly with the marzipan is a must. I was doing this a few hours before it was to be eaten (indeed guests began arriving before I'd finished the cake) so it wasn't so much of a problem for me.


Next it was working the fondant until it was soft enough to roll out. But it should have been to cover the cake in a sugar syrup. Forgetting the sugar syrup is why I had problems getting the fondant to stick to the cake, and why it wasn't as smooth as I'd intended... At this point you can smooth it out as much as possible as well by rubbing your hand gently in sweeping arcs across the cake - the warmth from your hand should help smooth everything. At this point I also piped on a shell border around the cake, and the lettering on the top. The lettering would be much better if I'd had a plain nozzle as well, but I didn't have time to fiddle with zip-lock bags to make one (guests were arriving!). Unfortunately the royal icing was a little runnier than I'd like, so it flopped a bit. *sigh* piping fail... it looked ok, not perfect but... pictures:
 

Once the piped icing had set, it was a case of securing ribbons. To do this, I cut 2 lengths that were just greater than the circumference of the cake. I pinned these to the cake, with the ends just overlapping, about a centimeter apart (see left-hand photo below). I then took 2 5cm(ish) lengths, doubled them over into short bows, and pinned them over the joins. This is why pin-heads are not pretty on these cakes! I'm not clever enough to join them up without showing the pinheads, although I'm sure I could work it out if I'd had more time (perhaps if I do a similar cake again...). Once I'd done the ribbon, I went and raided the garden for flowers (just make sure the ones you pick are non-toxic!!!!! if you're unsure, use something else!). I ended up with white star-jasmine and tiny pink roses, so used a couple of rose leaves as well.
To do the flower arrangements, I took a couple of large loops of ribbon and pinned them to the cake (over the spot where the icing was crappiest). I then arranged the flowers in and around the ribbon loops. I left the ends of the ribbon trailing as I thought it looked nice.


In hindsight I'd have made the arrangement longer and would have swept it further around to the left (it looks a bit short for the cake from these photos, I didn't really notice it at the time but it's bothering me now!). I also do regret not at least trying the zip-lock bag (nick the corner to make a small hole then use it as a disposable piping bag) to do the lettering, I really do think it would've looked so much better than the chunkier outcome. At least the flowers looked nice though :)

Overall I was surprised at how easy this was to do. I'm told it tasted good (I didn't take a piece when it was cut, and then when I went to get some later it was all gone, so I'm assuming it was good!)


In a word? Imperfect*

*Due to lack of time. But certainly not impossible!


Thursday 13 December 2012

My younger sister's wedding cake...

So now I present the second of three cakes that will appear in this blog that I didn't make (all 3 are made by my Mum. Well, one (my own wedding cake) is yet to be ;) ).

This one is my younger sister's wedding cake, and was again decorated with fondant flowers.

This one was a more simple design than my other sisters'. Lilies, Bouvardia and purple Lisianthus make up the floral pretties. The theme was royal purple, hence the ribbon.

Difficulty: Very Difficult
Time: Several months (for the flowers), a week or so to put it together


Anyway, now pics! (apologies for the crappy quality, the lighting wasn't good and my camera was on the blink too)


In a word? Purple!

Tuesday 10 July 2012

Sarah's cute cuttlefish cake

Rating: Easy
Time: 3-4 hrs (includes 40mins baking time)

So I've decided to include a time thing at the beginning as well as a difficulty, as how long it takes to do these things is something I'm often asked.
Anyway, the latest cake was a striped pajama squid (although it's technically a cuttlefish, hence the title) that I made for my cephalopod obsessed marine biologist friend, Sarah ;)


striped pajama squid cake


You will need:
- 1 or 2 chocolate cake(s) baked in a loaf tin (and/or a round tin - the number of cakes will be dependent on how big you want this and how clever you are in using off-cuts from the loaf cake to make the head)
- Marshmallow fondant (mmf)
- Marzipan
- White and Dark chocolate (about 1/2 block of white, and a very small quantity of dark)
- A new (and cheap) paintbrush or two
- Yellow food-colouring
- Butter-cream (optional - also it can be coloured with blue food-colouring if you so wish)
- Toasted coconut, or untoasted and shaken with a spoon of cocoa and turmeric.

So I started out by making two chocolate cakes, but in hindsight I really only needed the one. I baked one in a loaf tin, and another in a round tin (recipe was a basic chocolate cake, but you could use any you liked). As I said with the dragon cake, it's much easier if you bake them a day or two in advance and keep them wrapped in gladwrap in the fridge. They're much easier to handle and don't crumble when you try to cut/sculpt them.

cut and positionedlook at all the bits! Didn't use the snakes in the end though


So first I cut the cakes to shape, and positioned them on the board how I'd like them. Then I filled them with a butter-cream that was supposed to be blue that turned green, damnit. Because cephalopods have blue blood. Anyway, the next step was to cover the whole thing in marzipan, to protect the cake from leeching moisture into the marshmallow fondant.


covered in marzipan. Sorry 'bout the terrible photo, I was busy at the time!and covered now in fondant. With the siphon, eyes and tentacles on now too:)

Then I covered the whole thing in rolled-out marshmallow fondant (I'd made it a couple of days beforehand, but you could easily do it while the cakes were in the oven) and modeled some into tentacles, eyes and the siphons between the head and mantle. To make the little fringey bits they have, I pressed the mmf on the mantle out flat and snipped it with scissors before rolling it up slightly with a chopstick. I did originally try making the tentacles out of lolly snakes covered with mmf, but they were too chunky and it looked weird so I modeled them out of fondant instead. Siphons were made by rolling a small rectangle out of mmf and wrapping it around my pinkie finger to make a short tube.

A fin under constructionA fin is on andthe eyes are painted...

Next I made the fins/wings, by shaping them from melted white chocolate on gladwrap, and sticking some bamboo skewers in them so I could secure them in the cake. I did them one at a time, and while the second one was setting I painted on the eyes with yellow food colouring, and began painting on dark chocolate stripes on the head. You could pipe the chocolate onto the body, but for the head with all the weird angles a brush is much easier.


the stripes are going on, thick and fast...The head is done :)

The head was the trickiest bit, but I finally finished it and then stuck on the second fin.

The squid is done, now for some sand...Finished!

Once all the stripes were on, it finally looked like a PJ squid! But then I wanted to add some sand, so I used a fine dessicated coconut shaken in a bag with a spoon of cocoa and a small amount turmeric (to make it yellow). It worked ok - it certainly had a sand-like texture, and I think the colour turned out well :)

A happy marine biologist :)

Sarah liked her cake! (I think :P)

alas poor Yorick

...And all that was left was the head :( Poor squid. Tasty though :)

Overall it was actually a surprisingly easy cake to make. Covering it with marzipan definately worked better than not doing that (as for the dragon cake). I probably wouldn't bother with the butter-cream again though - it was done more as a thing to make it bleed when cut than anything else. Yes, we biologists are a weird lot ;)


In a word: Squiddy!

Saturday 2 June 2012

Mel's Mousse Madness

Rating: Easy, but time-consuming


This one was made for a netball friend, so I'm glad it set well!
It's a chocolate and raspberry mousse cake, recipe below. From bottom to top the layers are a flourless chocolate cake, chocolate mousse, raspberry and white chocolate mousse and raspberry jelly all wrapped in a white chocolate collar.

Flourless chocolate cake:
200g dark chocolate
85g unsalted butter
1 teaspoon vanilla extract
4 large eggs, separated
pinch of salt
1/3 cup brown sugar

Grease a 23cm spring-form tin and pre-heat the oven to about 180 degrees celcius. Melt chocolate and butter in a large bowl, leave to stand until it's no warmer than blood temperature then stir in egg yolks and vanilla.
Whisk egg whites with salt and brown sugar until soft-peak, and gently fold 1/3 into the chocolate mixture. Fold in remaining egg whites (doing it in 2 lots helps prevent knocking the air out, keeping the cake lighter), and pour batter into tin. Bake for 20 minutes or so, until the cake has risen, the edges are cooked and the top is springy when touched (if you're not sure a skewer inserted into the middle should come out clean).
This cake WILL and should sink as it cools - you've not done anything wrong! Once it's cooled, you can do the next layer...

Chocolate mousse layer
1 1/2 cups thickened cream
350g dark chocolate
3 tablespoons water
3 tablespoons sugar
3 egg yolks

Put water and sugar in a small pan and heat until the sugar is dissolved (it may boil but that's ok). Whisk egg yolks in a small bowl, then drizzle in the syrup slowly (you'll need to continually whisk this as it will cook the egg yolks and if you don't whisk it you'll get lumps). Whip cream to soft peak, set aside. Melt chocolate and then whisk it into the egg mixture. You may need to heat the mixture in the microwave for 20 seconds, before adding 1/3 of the cream and stirring until fully combined. Add in the rest of the cream, and fold in gently. Pour layer on top of the cake (you'll need to have kept the cake in the spring-form tin of course - I should probably mention it's a good idea to use greaseproof paper to line the tin all the way up the sides, it helps get the mousse out of the tin without making a huge mess and it'll just peel off when the mousse is set) and put in the fridge to firm up for at least half an hour. Then you can do the next layer...

Raspberry and white chocolate mousse layer, plus raspberry jelly
1 tablespoon water
1 teaspoon unflavored gelatin
1kg frozen raspberries
1 tablespoon sugar
170g white chocolate, finely chopped
1 cup thickened cream

Thaw and squish the raspberries through a strainer to remove pulp and seeds and make a smooth syrup. Try to get as much juice out of them as you can. Put the liquid into a saucepan and add sugar. Heat until boiling, and reduce to about half, stirring occasionally. Add gelatin to water, and stir into the raspberry syrup. Place white chocolate in a bowl, and add about 1/2-3/4 of a cup of raspberry syrup. Set the rest aside for use later as the jelly layer. Stir in the white chocolate, until all is melted and it is smooth. You shouldn't need to heat it any more to melt the chocolate - it should melt with the residual heat of the syrup. Whip cream to soft peak, and stir 1/3 into the raspberry/white chocolate mixture, then fold the remaining cream in gently. Pour over chocolate mousse layer, and put back in the fridge to set.

When the raspberry mousse layer is firm (but it doesn't have to be completely set), pour over the remaining raspberry syrup* and put back in the fridge.

Once mousse is completely set, you can make the white chocolate collar. Take a piece of grease-proof kitchen paper, and cut/tear it to a length slightly more than the circumference of the cake. Fold over sides and ends to make a rectangle of the desired length/width, keeping the folded pieces facing upwards (sorry, wish I'd got a photo of this to make it clearer). Melt chocolate in a small bowl, pour onto paper and spread evenly with a palate knife.
Once chocolate ribbon is set but still soft, remove spring-form tin and wrap it around the cake. Refrigerate until you're just about ready to eat it, then remove the paper (it should just peel off). By folding over the sides of the paper, you should get a nice straight edge. And hooray! A delicious mousse-y cake :)

*You may need to add more gelatin to this syrup - just dissolve a bit more in some more water and stir it in. I tested this by putting a small amount in the fridge and seeing if it set before I put it on the top of the cake :) I did indeed need more gelatin, so testing it was a good idea!

In a word? Moussey :)

Thursday 26 April 2012

Making marshmallow fondant

I just remembered that I meant to put up a post on how to make marshmallow fondant (mmf).

Difficulty rating: Easy

Take equal parts icing sugar and marshmallows. Use the best quality you can get, as the cheaper ones tend to result in a grainy textured fondant. Also beware of icing mixture - for this you want pure icing sugar if you can get it.
Heat the marshmallows in the microwave until they bubble up, remove the bowl and stir with a spatula until the mixture is smooth. Add any food colouring you like*, a tablespoon of water for every 250g of marshmallows and half the sifted icing sugar. Sifting is something I often don't bother with, but for this it prevents lumps and makes your life a lot easier. You will need more icing sugar later too, so sift more than you need at this stage.
Stir in the sugar, it should take all of it and not become too lumpy. Then add in the other half, and stir until the mixture is a weird crumbly but sticky texture (you could have added it all in one go, but it's easier if you do it in 2 lots). Don't panic, this is what it should look like ;)

Oil your hands and dust them with more icing sugar. Do the same to your work surface (use quite liberal amounts of the icing sugar or your fondant will stick to the surface) and turn out your mixture. Knead it like you would bread dough, incorporating more icing sugar until it becomes firm, is no longer sticky and resembles something like playdough (albeit with a tougher texture). If you eat a bit, it should have a firm but slightly springy texture. This might take quite a while, so be prepared to work those muscles kneading!
If you run out of icing sugar on your work surface before it loses it's stickiness, add more and keep working it.
The trouble I had was maintaining sticky-free hands - you may have to keep washing your hands, re-oiling and re-dusting them.

Once you've made the stuff, it is fine kept in a sealed container in the fridge for a couple of weeks (although I used mine within a couple of days). I'd also wrap it in gladwrap before putting it into the container, but perhaps I'm just paranoid that it'll dry out if I don't. When you want to use it, just give it a quick knead to loosen it up and return it to a more workable state.
Be prepared to get sticky everywhere, but hot water cleans up the mess relatively easily.
This stuff is great for giving a nice even covering for cakes, and can be moulded into shapes or cut like biscuit dough. If you need to stick mmf decorations to other parts of your cake, just brush one piece with a little water and you'll have no problems there ;) This also tastes so much better than the packet fondant you can get - it for some reason isn't quite as sweet and has a light texture (due to the marshmallows). You'll probably still want to seal your cake with marzipan or something similar before you cover it in mmf (otherwise you'll get moisture buildup between the fondant and the cake, making it sticky), although for the dragon cake I didn't bother as it was going to be eaten the following day anyway.
It's fun to make and you can do cool things with it! What more could you want? ;)

In a word? Sticky.

*If you use liquid food colouring, be prepared to use a lot to make a strong colour, and beware that it may give it a slightly odd taste. I've never seen anything absorb liquid colour to no effect like this stuff does. I'd suggest using a powder if you can get it though, and mix it through the melted marshmallow before you add the sugar (to give a more easily smooth colour - otherwise it'll take a very long time to knead it smooth!). If you use a liquid, also be prepared to add a lot more sugar, and don't add the water. It will make it so much more sticky than not using the colouring at all! Other options to colour it can be melted chocolate, cocoa powder and basically anything you can get your hands on ;)

Tuesday 24 April 2012

Playing with cakes runs in the family

So this is a bit of a cheaty post. This cake is not one I made (although I did help out with bits), rather my mother made it.
It is my elder sister's wedding cake, a traditional fruitcake with fondant flowers and piped lacework.
Flowers are white roses, Australian alpine bluebells (Wahlenbergia) and Bouvardia. The theme was navy blue and silver (hence the navy blue ribbon under the piped lace and also the use of the Whalenbergia), and the piece of lace in the arrangement on the top tier is the same as that on my sister's dress :)

Difficulty: Ridiculously hard

Anyway, pics now. Enjoy!


In a word? Astounding